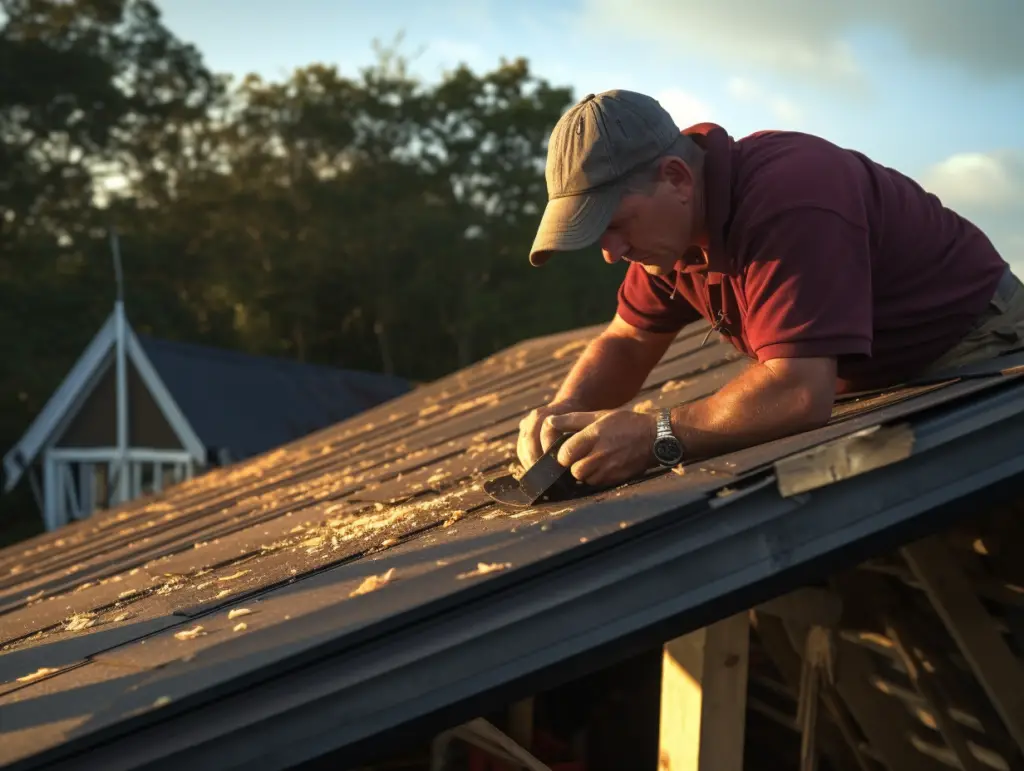
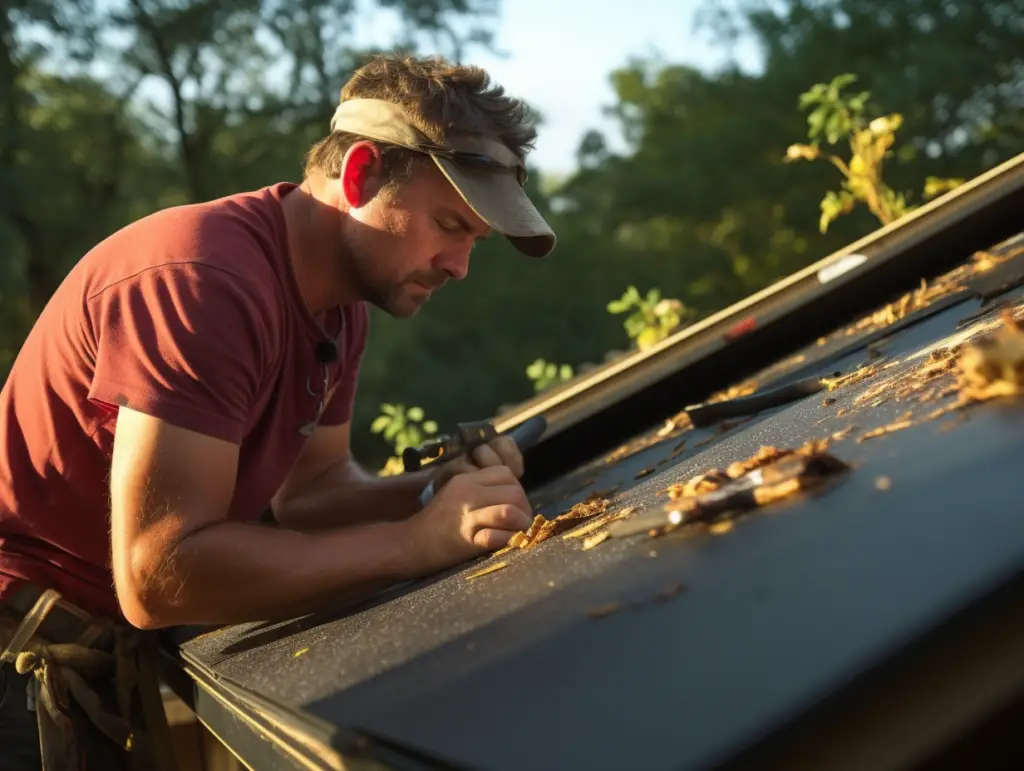
If you’re looking to build a shed, one of the most important aspects to consider is the roof. A well-built roof will protect your shed from the elements and ensure that it lasts for years to come. While roofing a shed may seem like a daunting task, it’s actually quite manageable with the right tools, materials, and know-how.
The first step in roofing a shed is to choose the right type of roof for your needs. There are several different styles of roofs to choose from, including gable, gambrel, skillion, and saltbox. Each style has its own advantages and disadvantages, so it’s important to carefully consider which one will work best for your shed.
Once you’ve chosen a style, you’ll need to gather the necessary materials and tools, including roofing shingles, underlayment, flashing, nails, and a hammer. With these essentials in hand, you’ll be ready to start roofing your shed.
Planning and Preparation
Before you begin roofing your shed, it is important to plan and prepare properly. This section will cover the necessary steps to ensure a successful roofing project.
Choosing the Right Roofing Material
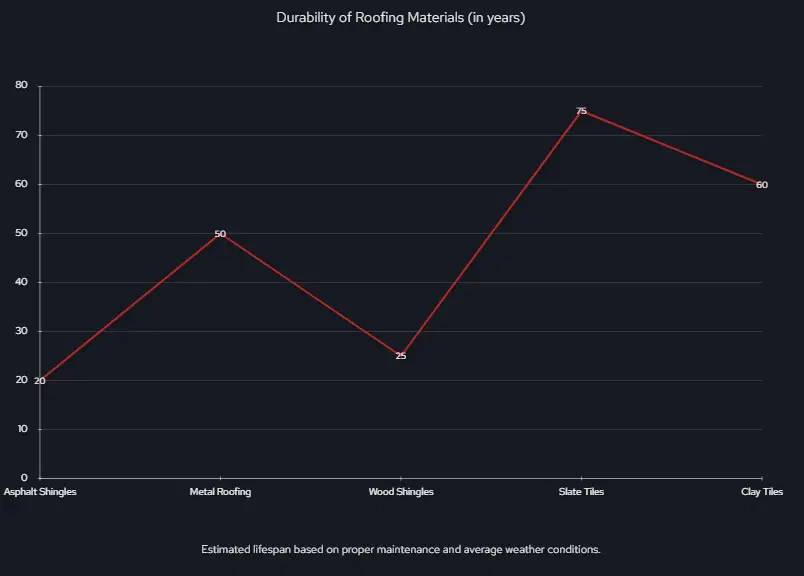
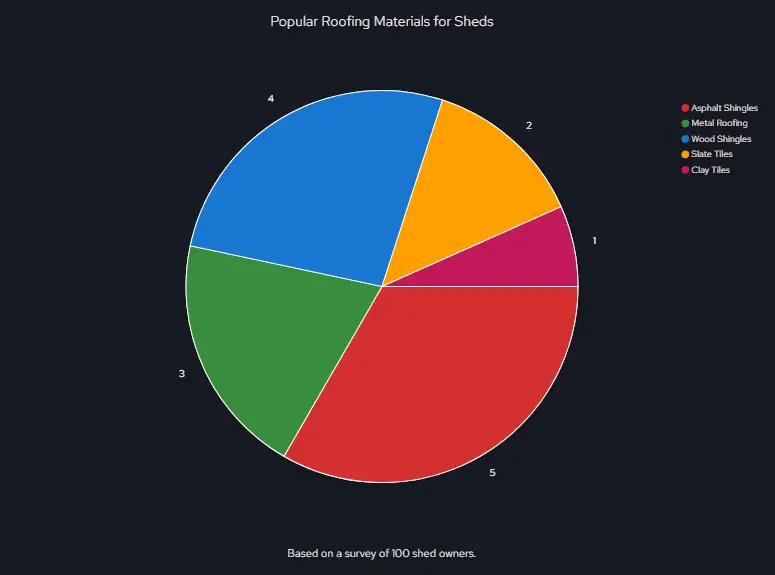
The first step in planning for a shed roof is to choose the right roofing material. You have several options, including shingles, roll roofing, corrugated roofing, or roofing panels.
Each material has its own advantages and disadvantages, so it is important to choose the one that best suits your needs. Consider factors such as durability, cost, and aesthetic appeal.
Measuring the Shed Roof Area
Once you have chosen your roofing material, you need to measure the shed roof area to determine how much material you will need. Use a tape measure to measure the dimensions of the roof area horizontally and vertically. Use these measurements to calculate the square footage of the roof.
Gathering the Necessary Tools and Materials
Before beginning your roofing project, gather all the necessary tools and materials. You will need a ladder, plywood gusset plates, roofing nails, wood screws, washers, staples, a utility knife, a framing square, a roofing nailer, a drip edge, flashing, caulk, and a torch-down if using roll roofing.
You will also need the appropriate amount of roofing material and underlayment. Refer to your shed plans to ensure you have all the necessary tools and materials.
Now that you have chosen your roofing material, measured the roof area, and gathered the necessary tools and materials, you are ready to begin framing your shed roof.
Building the Shed Roof Frame
Building the roof frame is a critical step in constructing a shed. It is important to ensure that the roof is strong enough to withstand the elements and support the weight of the roofing material. In this section, we will cover the steps involved in building the shed roof frame.
Determining the Roof Pitch
Before you start building the roof frame, you need to determine the roof pitch. The roof pitch is the angle of the roof, and it is essential to get this right to ensure that the roof is strong enough to support the weight of the roofing material.
The pitch is usually expressed as a ratio of the rise to the run. For example, a pitch of 6:12 means that the roof rises 6 inches for every 12 inches of horizontal run.
Cutting and Installing Trusses
Once you have determined the roof pitch, you can start cutting and installing the trusses. Trusses are the triangular structures that support the roof.
You can either buy pre-made trusses or make them yourself. If you are making the trusses yourself, you will need to use a circular saw to cut the lumber to the correct size and shape.
Attaching Plywood Sheathing
After the trusses are in place, you can attach the plywood sheathing. Plywood sheathing is the material that covers the trusses and provides a base for the roofing material.
You will need to use wood screws to attach the plywood to the trusses. It is important to ensure that the plywood is attached securely to the trusses to prevent it from coming loose in high winds.
Adding Plywood Gussets
To make the roof frame even stronger, you can add plywood gussets. Gussets are triangular pieces of plywood that are attached to the joints between the trusses and the ridge beam. They help to distribute the weight of the roof evenly and prevent the trusses from twisting or warping over time.
In conclusion, building the shed roof frame is a critical step in constructing a shed. It is important to ensure that the roof is strong enough to withstand the elements and support the weight of the roofing material.
By following the steps outlined in this section, you can build a strong and durable roof that will last for many years.
Installing the Roofing Material
Once the roof framing is complete, it’s time to install the roofing material. The process involves applying underlayment, laying the shingles, installing flashing and drip edge, and adding ridge caps. Here’s how to do it:
Applying Underlayment
Before installing the shingles, it’s essential to apply underlayment to protect the roof from water damage. There are two types of underlayment: felt paper and synthetic. Felt paper is cheaper, but synthetic underlayment is more durable.
To apply underlayment, start at the bottom of the roof and work your way up. Overlap each row of underlayment by at least 6 inches horizontally and 2 inches vertically. Secure the underlayment with roofing nails or staples.
Laying the Shingles
Once the underlayment is in place, it’s time to lay the shingles. Start at the bottom of the roof and work your way up. Overlap each row of shingles by at least 6 inches horizontally and 2 inches vertically.
Secure each shingle with roofing nails, making sure to nail them in the correct position. Use four nails per shingle, with the nails placed about an inch above the cutout and about an inch from each end of the shingle.
Installing Flashing and Drip Edge
Flashing and drip edge are essential components of the roof. Flashing prevents water from seeping into the roof, while drip edge directs water away from the fascia.
To install flashing, cut it to size and place it in the correct position. Secure it with roofing nails or screws and seal it with caulk.
To install drip edge, start at the bottom of the roof and work your way up. Overlap each piece of drip edge by at least 2 inches. Secure it with roofing nails or screws and seal it with caulk.
Adding Ridge Caps
The final step is to add ridge caps. Ridge caps are shingles that are specially designed to cover the ridge of the roof.
To install ridge caps, cut the shingles to size and place them over the ridge. Secure them with roofing nails, making sure to nail them in the correct position. Use two nails per shingle, with the nails placed about an inch from each end of the shingle.
In conclusion, installing a roof on a shed is a straightforward process that requires attention to detail. By following these steps, you can ensure that your shed has a durable and watertight roof that will last for years to come.
Finishing Touches
Once you have installed the roof of your shed, it is time to add the finishing touches. This section will cover the final steps of trimming the roof and cleaning up the work area.
Trimming the Roof
Trimming the roof is an essential step in finishing the roof of your shed. Use tin snips to trim the excess roofing material at the edges of the shed. Be sure to leave enough material to overlap the edge of the shed by at least 1 inch. This will prevent water from seeping into the shed and causing damage.
If you have used plywood gussets to reinforce the roof, trim them to fit the shape of the roof. Use a hammer and utility knife to trim the gussets to the correct size. This will ensure that the gussets are flush with the roof and do not create any unevenness.
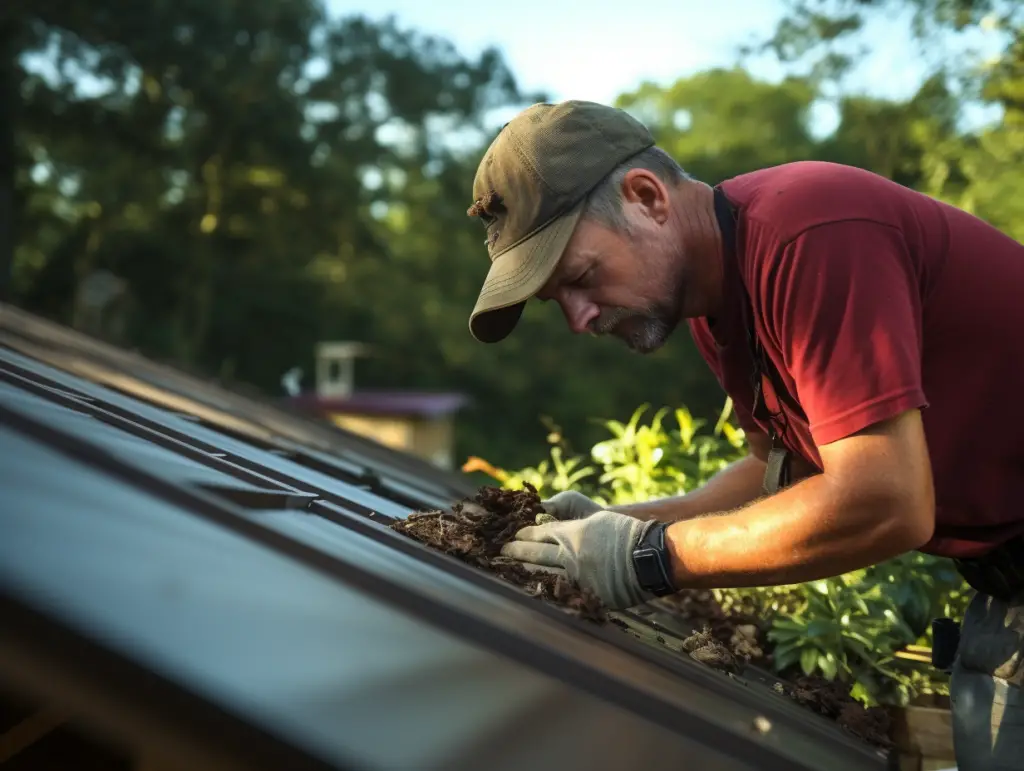
Cleaning Up
After you have finished trimming the roof, it is time to clean up the work area. Remove any debris, such as roofing nails or scraps of roofing material, from the roof and surrounding area. This will prevent accidents and ensure that the area is safe to use.
If you have a workshop or other workspace nearby, be sure to clean up any tools or materials that you used during the roofing process. This will prevent accidents and ensure that your workspace is clean and organized.
Conclusion
Adding the finishing touches to your shed roof is an essential step in ensuring that your shed is protected from the elements. By trimming the roof and cleaning up the work area, you can ensure that your shed roof is secure and that your workspace is safe and organized.
![What Gravel To Use For Patio Base [Best Options]](https://www.cleverpatio.com/wp-content/uploads/2021/11/What-Gravel-To-Use-For-Patio-Base-270x180.jpg)
Leave a Reply