If you’re planning on building a shed on uneven ground, you may be wondering how to create a sturdy and level foundation. Uneven ground can make it challenging to build a shed base that will support the structure and prevent it from shifting or settling over time. Fortunately, there are several methods you can use to level the ground and create a solid foundation for your shed.
One option is to use concrete piers or screw piles to support the shed base. These are placed at intervals around the perimeter of the shed and provide a stable base for the structure.
Another option is to build a retaining wall to hold back the soil and create a level area for the shed foundation. This method is especially useful for steeply sloping ground, where a retaining wall can help to prevent erosion and provide a stable base for the shed.
Before you begin building your shed foundation, it’s important to gather all the necessary equipment and materials. You’ll need a level, a measuring tape, a hammer, nails, and other basic tools, as well as the materials for your chosen foundation method.
If you’re not experienced in construction or DIY projects, it may be helpful to consult with a professional or seek out online resources to guide you through the process. With the right tools and techniques, however, you can create a sturdy and level shed base on uneven ground.

Site Preparation
Before you start building a shed, it is essential to prepare the site properly. Site preparation is crucial to ensure that the shed stays level and stable, especially if the ground is sloped. In this section, we will discuss the steps involved in site preparation, including clearing the area and leveling the ground.
Clearing the Area
The first step in site preparation is to clear the area where you want to build the shed. Remove any vegetation, rocks, or debris from the site. This will ensure that the ground is level and stable. You can use a shovel, rake, or a brush cutter to clear the area.
Leveling the Ground
If the ground is sloped, you will need to level it before building the shed. Leveling the ground involves removing soil from the high points and adding soil to the low points. You can use a shovel, a rake, or a hoe to level the ground.
To ensure that the ground is level, you can use a spirit level. Place the spirit level on the ground and check the bubble. If the bubble is not in the center, then the ground is not level. You will need to adjust the ground until the bubble is centered.

If the slope is significant, you may need to build a retaining wall to hold back the soil. A retaining wall is a structure that holds back soil or rock from a building, structure, or area. You can build a retaining wall using concrete blocks, bricks, or timber.
In conclusion, site preparation is crucial when building a shed on uneven ground. Clearing the area and leveling the ground are the two main steps involved in site preparation.
If the ground is sloped, you may need to build a retaining wall to hold back the soil. With the right construction skills and tools, you can build a level and stable shed base on uneven ground.
Choosing the Foundation
When building a shed on uneven ground, choosing the right foundation is crucial. There are several options to consider, each with its own benefits and drawbacks. Here are some of the most common foundation types for sheds built on uneven ground:
Wooden Posts
One of the most popular options for building a shed foundation on uneven ground is using wooden posts. This involves digging holes at equal intervals and placing wooden posts in them.
The posts are then secured in place with concrete. This type of foundation is ideal for sheds that are not too large and do not require a lot of weight-bearing capacity.
Concrete Piers
Another option for building a shed foundation on uneven ground is using concrete piers. This involves digging holes and pouring concrete into them.
The concrete piers are then topped with a post bracket, which is used to attach the shed to the foundation. This type of foundation is ideal for larger sheds that require more weight-bearing capacity.
Sonotubes
Sonotubes are another popular option for building a shed foundation on uneven ground. This involves digging holes and placing cardboard tubes in them. The tubes are then filled with concrete and allowed to dry.
Once the concrete has dried, the tubes are removed, leaving a concrete pillar that can be used to support the shed. This type of foundation is ideal for sheds that require a lot of weight-bearing capacity.
Screw Piles
Screw piles are a relatively new type of foundation that is becoming increasingly popular for building sheds on uneven ground. This involves drilling a hole into the ground and then screwing a large metal pile into it.
The pile is then topped with a bracket that can be used to attach the shed to the foundation. This type of foundation is ideal for sheds that require a lot of weight-bearing capacity and can be installed quickly and easily.
When choosing a foundation for your shed, it’s important to consider your construction skills, the weight-bearing capacity required, and the size of your shed. By choosing the right foundation, you can ensure that your shed is stable, secure, and built to last.
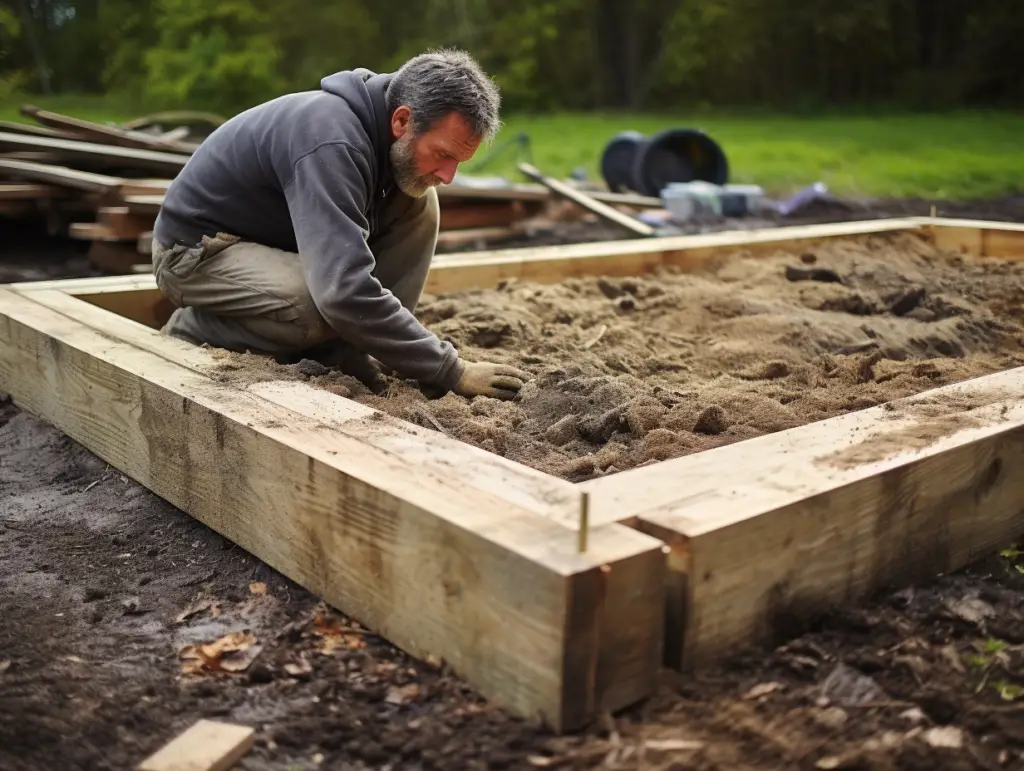
Building the Base
When it comes to building a shed base on uneven ground, the process can seem daunting. However, with the right materials and construction skills, it can be done with ease. In this section, we will cover the steps required to build a sturdy shed base on uneven ground.
Laying the Beams
The first step in building your shed base is to lay the beams. These are the foundation of your shed and will provide support for the rest of the structure. Start by measuring the area where you want to build your shed and mark the corners of the foundation. Then, dig out the soil to a depth of at least 6 inches.
Next, lay the beams in the dug-out area. The beams should be placed parallel to each other, with a distance of 2-3 feet between them. Use a level to ensure that the beams are even and adjust as necessary. Once the beams are in place, secure them with stakes or screws.
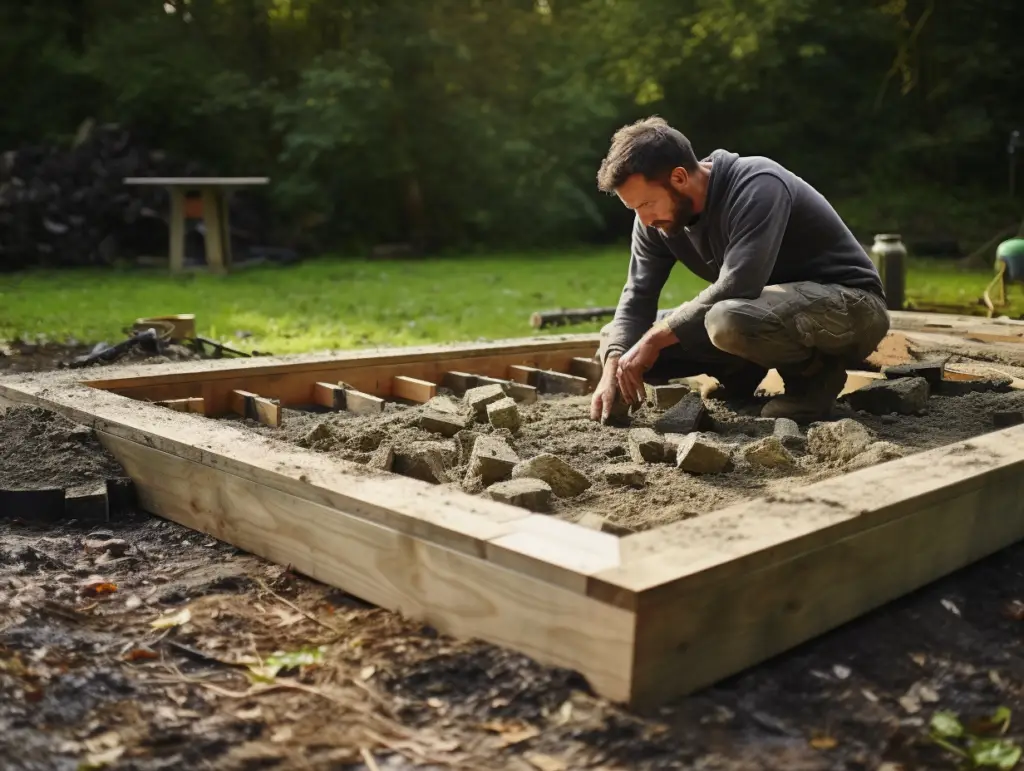
Installing the Joists
Once the beams are in place, it’s time to install the joists. These will provide support for the floor of your shed. Start by measuring the distance between the beams and cut the joists to size. Then, place the joists on top of the beams, perpendicular to them.
Secure the joists to the beams using joist hangers or screws. Make sure that the joists are evenly spaced and level. Once the joists are in place, you can add the flooring material of your choice.
Adding Sturdiness
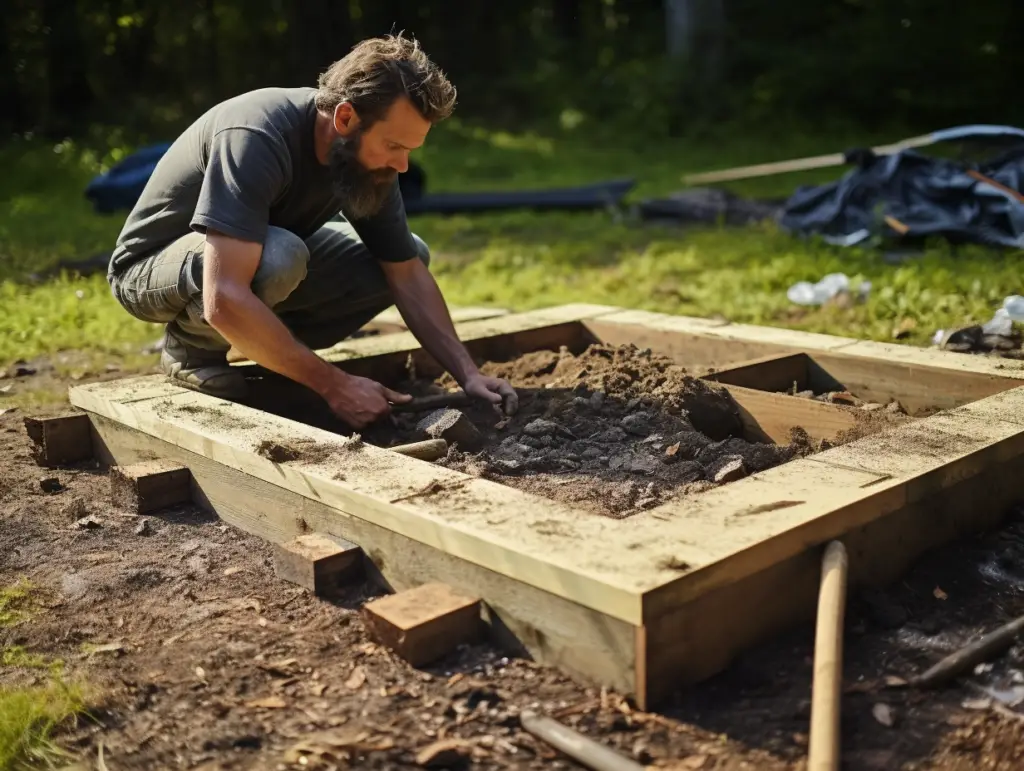
When building a shed base on uneven ground, it is important to ensure that the foundation is sturdy enough to support the weight of the shed. Here are two ways to add sturdiness to your shed base:
Retaining Wall
If the slope of the ground is too steep, you may need to build a retaining wall to hold back the soil and create a level area for the shed base. A retaining wall can be made from wood, concrete blocks, or stone. The wall should be built on a solid foundation, such as a concrete footing, and should be at least as high as the height of the slope.
Additional Posts
Adding additional posts to the shed base can also increase its sturdiness. The posts should be placed at equal intervals along the perimeter of the shed base and should be anchored securely to the ground. The posts can be made from wood, metal, or concrete, depending on your preference and the size of the shed.
When adding posts, it is important to ensure that they are level and plumb. Use a spirit level to check the vertical and horizontal alignment of the posts. If the ground is uneven, you may need to dig deeper holes for some of the posts to ensure that they are all at the same height.
In summary, adding a retaining wall or additional posts to your shed base can help to increase its sturdiness and ensure that it can support the weight of the shed. With the right construction skills and materials, even a shed base on uneven ground can be made strong and durable.
Finishing Touches
After you have completed the foundation for your shed, it is time to add some finishing touches to ensure that your shed is stable and secure. Here are some tips to consider:
Leveling the Shed
Before you start building the shed, make sure that the foundation is level. If the foundation is not level, your shed will not be stable, and it may even collapse. Use a spirit level to check if the foundation is level. If it is not level, use shims to level it out.
Adding a Moisture Barrier
A moisture barrier is an essential addition to your shed foundation. It will prevent moisture from seeping into the shed and causing damage. You can use a plastic sheet or a moisture barrier paint to create a barrier. Make sure that the barrier is installed correctly and covers the entire foundation.
Sealing the Foundation
Sealing the foundation will help to prevent water from seeping into the shed. You can use a sealant or a waterproof paint to seal the foundation. Make sure that the sealant is applied evenly and covers the entire foundation.
Installing Anchor Points
Anchor points are essential to secure your shed to the foundation. You can use anchor bolts or metal brackets to secure the shed to the foundation. Make sure that the anchor points are installed correctly and are strong enough to hold the shed in place.
Necessary Tools
To complete the finishing touches, you will need a few tools. Here are some of the necessary tools to consider:
- Spirit level
- Shims
- Moisture barrier
- Sealant or waterproof paint
- Anchor bolts or metal brackets
Value
Adding finishing touches to your shed foundation will increase its value. A stable and secure shed will last longer and require less maintenance, making it a valuable addition to your property.
HOA
If you live in a neighborhood with a homeowners association (HOA), make sure that you follow their guidelines when building your shed foundation. Some HOAs have specific requirements for shed foundations, such as the size and height of the shed.
Adding finishing touches to your shed foundation is essential to ensure that your shed is stable and secure. Make sure that you level the foundation, add a moisture barrier and seal the foundation, install anchor points, and use the necessary tools. By following these tips, you can increase the value of your shed and ensure that it lasts for years to come.
Conclusion
Building a shed base on uneven ground can be a challenging task, but with the right tools and techniques, it can be done successfully. DIY shed base installation is a great way to save money and create a customized shed that meets your needs. However, it is important to take the time to properly prepare the ground before beginning the installation process.
If you’re new to DIY shed base installation, there are plenty of resources available on YouTube that can help you get started. You can find step-by-step tutorials and helpful tips from experienced builders who have tackled this project before. Take advantage of their expertise and learn from their mistakes to avoid making the same ones yourself.
When choosing a shed base, consider the latest features available on the market. Look for bases that are durable, weather-resistant, and easy to install. Some of the best options include plastic, concrete, and wooden bases.
No matter which type of base you choose, it is important to ensure that it is level and stable. Use a spirit level to check for any bumps or dips in the ground, and make adjustments as necessary. This will help prevent your shed from leaning or shifting over time.
Building a shed base on uneven ground requires careful planning and attention to detail. With the right tools and techniques, you can create a sturdy foundation for your shed that will stand the test of time. Whether you’re a seasoned DIYer or a beginner, take the time to do your research and make informed decisions to ensure a successful project.
![What Gravel To Use For Patio Base [Best Options]](https://www.cleverpatio.com/wp-content/uploads/2021/11/What-Gravel-To-Use-For-Patio-Base-270x180.jpg)

Leave a Reply