If you’re looking for a beautiful and creative way to extend the living space of your home, then building a freestanding patio cover is an excellent option.
A freestanding patio cover can provide shade during the summer months, while also adding some warmth in the winter.
It’s usually less expensive than other types of covers, plus there are many different design options available on the market today!
Read on to find out how you can build a freestanding patio cover and I have included some great patio cover ideas and designs.
What is A Freestanding Patio Cover?
A freestanding patio cover is a structure that acts as a canopy over the patio or deck of a home. The structure is supported by posts and beams and does not require direct connection to any part of the house or structure, which makes it freestanding.
In addition, patio covers are typically made from wood, vinyl, aluminum alloy mesh, corrugated steel, sheet metal, or glass.
Patio covers can be installed at any time and do require building permits in most communities.
Patio Covers are an excellent way to increase the value of your home and provide you with a safe and functional space for entertaining on those summer days.
Read More:[FULL GUIDE] How Much Do Patio-Pergola Covers Cost?
The Benefits of a Freestanding Patio
A freestanding patio cover is a great way to add an extra level of comfort and protection from the elements for your outdoor living space.
These can be used with or without a wall, and they come in a variety of styles, roof pitches, and materials.
They’re a smart investment if you entertain often, serve food outside regularly, or have little ones.
Here are some benefits of building a freestanding patio cover:
A Freestanding Patio is Usually Larger
One of the biggest benefits of a freestanding patio cover over a walled enclosure patio is that they’re usually bigger.
In fact, many homeowners who choose this option for their outdoor living space create an ideal entertaining area with plenty of room for guests.
The extra elbow room also makes it easier to set up rows of chairs or tables and gives everyone more freedom to move around.
Read More: Best Material for Patio Covers: [Comprehensive Guide]
A Freestanding Patio Tends to Be Easier to Install
Attaching the cover of your patio to the top of your home might be difficult and hazardous. If the roof structure isn’t robust enough, the cover will collapse.
A free-standing patio is more durable and safe since it is supported by four posts that are not connected to any other structures.
A Freestanding Patio Adds to Your Home’s Curb Appeal
A freestanding patio cover is a great way to add architectural interest and curb appeal to your property. Because they come in such a wide variety of styles, you can choose one that complements your home’s design.
They also help frame the entrance to your house and improve the exterior of your property.
Now that you know what a freestanding patio cover is and the benefits of building a freestanding patio cover let’s get into building one yourself!
How to Build A Freestanding Patio Cover
The following instructions and video show how to build a free-standing patio cover. This means that your structure does not attach directly to the house.
A freestanding patio cover is easy to build, requires less construction material, and costs less than an architectural-style patio cover that attaches directly to the home.
The examples shown here are for a 20′ x 20′ patio cover. I’ve also included other options you can consider when designing your own patio cover to select the best design for your site.
Things You Will Need
| Circular saw | Quick-dry cement |
| Hammer | Gravel |
| Ladder | 3″ Lag bolts |
| Shovel | Galvanized screws |
| Socket set | Level |
| Jigsaw | Wheelbarrow |
| 4×4 pressure-treated boards | Power drill |
| 2×4 pressure-treated boards | Posthole digger |
| 2×10 pressure-treated boards | Screwdriver |
| 2×6 pressure-treated boards |
1. Mark The Area
You must first determine where you want to build a patio cover before beginning. You may begin by drawing an outline of the location where you want the cover to stand.
Mark The Area you want to build your patio cover on. You’ll usually end up with a rectangle or square-shaped area that you need to cover.
To mark the area, you can use whatever you want. To make the section more precise, mark it with stakes and a rope.
Sometimes it will be an odd shape and in this case, we can make it work too. The most important part is determining the size and location of the structure and the roof pitch (incline).
2. Dig The Holes
Now you need to dig out the area where your posts will be set. The size of each hole should be about 24 inches deep and 9 inches wide.
You can use a square shovel or an excavating machine for this task.
If you choose to use a square shovel, I recommend digging from each corner towards the center so that you have four equal sides of the excavation.
You can also dig in from the sides to create an octagon.
I generally use either a skid steer or bobcat for this task, but you can excavate by hand with any digging equipment.
3. Remove Moisture From The Hole
Pests and moisture can cause wooden posts to deteriorate. To keep such damage at bay, try filling each hole with gravel or crushed stone.
Fill the holes with gravel to a depth of three inches, then tamp it down. After that, fill the holes with three inches of gravel and tamp them down again.
4. Plant The Posts
After you’ve filled the holes with gravel, you can start inserting the 4×4 posts. Brace them with 2×4 pressure-treated boards for support to keep them in place.
Before moving on to the next steps, double-check that each post’s level is correct.
5. Secure Posts With Cement
Make a quick-dry cement mixture (you can see the label containing the directions on how to mix the cement).
Pour the cement around each post and let it dry for at least 24 hours to dry completely. You can move on to the next step once it has dried.
6. Create The Beams
Cut beams from the 2×10 boards to whatever length you require. Each beam must be able to span the distance between two posts.
If you want to add a decorative element to the beams, you can draw decorative patterns and cut them out to create the desired beams. However, it will be difficult.
7. Connect The Joist Beams With The Main Posts
By drilling holes through the joist beams and main posts, you can now begin assembling them. Then, using 3″ lag bolts, secure the beams to the posts.
Before moving on to the next step, double-check the level of the beams.
8. Build The Roof
Take your 2×6 boards and use them to build the roof structure. You can cut them down to size if necessary. You should not cut them down to the same length as the patio because they need to overhang a little.
They should be slightly longer than the patio. After you’ve cut them down, start laying them out so that they cross the joist beams in a perpendicular pattern.
Make sure they’re evenly distributed across the patio’s top. Install galvanized deck screws to keep them in place.
9. Cover The Roof
You now have the framework for a freestanding patio cover. Start covering the patio with your preferred materials, such as lattice wood, translucent fiberglass, wood and shingles, metal panels (aluminum), boards and netting, or canvas shade sails.
The structure you’ve just created is the most basic. There are a variety of structures that will look great on your patio.
However, before putting the roof on, double-check the level of the entire patio.
Check out these ten fantastic patios for more freestanding patio cover ideas and designs.
How Tall Does A Patio Cover Need To Be?
If you’re building a free-standing patio cover, the height is entirely up to you. However, at least 7 ft (2.1 m) is considered a decent average height.
You can build patio covers as high as you want them to be, but there are a few things to consider.
Keep in mind that if you’re going to have somebody over frequently (for example, during parties), they will need to step up and enter through the door of your patio cover.
An adult won’t fit under a roof with a height of less than 7 ft (2.1 m). At least 7 ft high is a decent average to go with.
10 Amazing Freestanding Cover Patio Ideas
There are various designs available when it comes to patio covers that can help in enhancing the look of your yard. There are lots of styles out there whether you’re going for an ultra-modern look or a quaint vintage feel.
To help you pick the right design, here are some options that can inspire you.
1. Freestanding Patio Cover with Traditional Accent
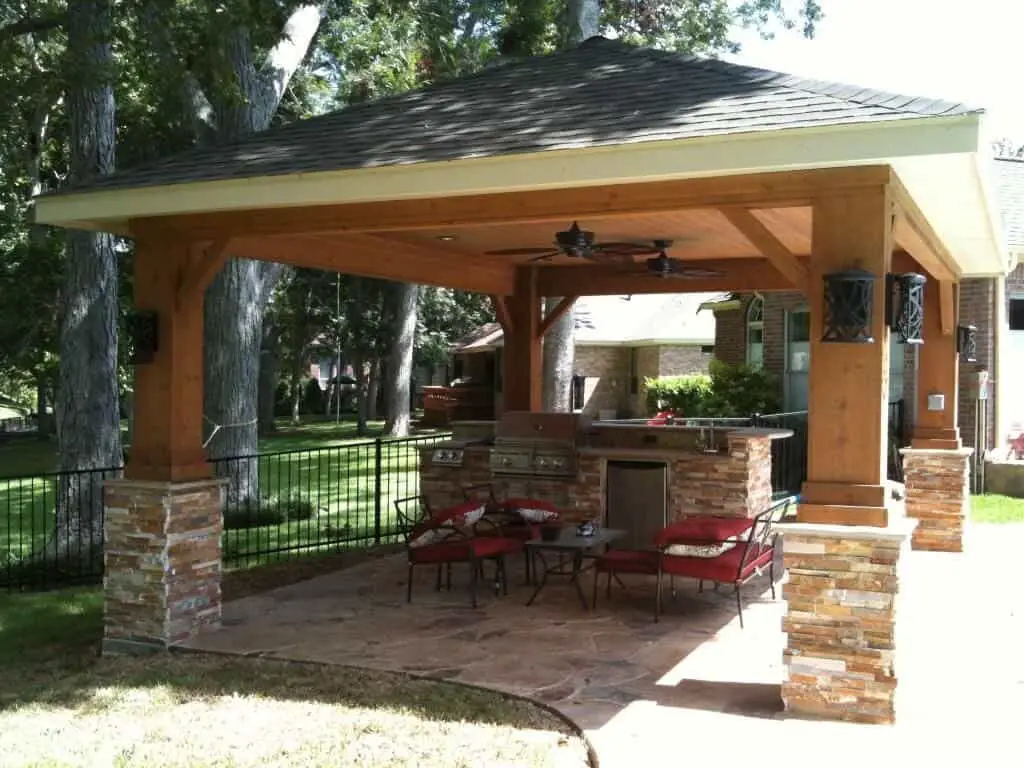
This patio adds a touch of tradition to your backyard. It’s similar to the ones you’d find in Bali.
The stained wooden posts give the patio a more natural and impressive appearance. Despite the lack of sophisticated patterns, the exposed beam ceiling adds to the appeal of the patio.
The black roof shingle contributes significantly to the traditional ambiance. It’s a perfect match for the chairs.
Because the roof slopes down from the center, water, snow, and leaves do not accumulate, making it easier to clean.
2. Wooden Freestanding Patio Cover

3. Freestanding Metal Roofing Patio Cover
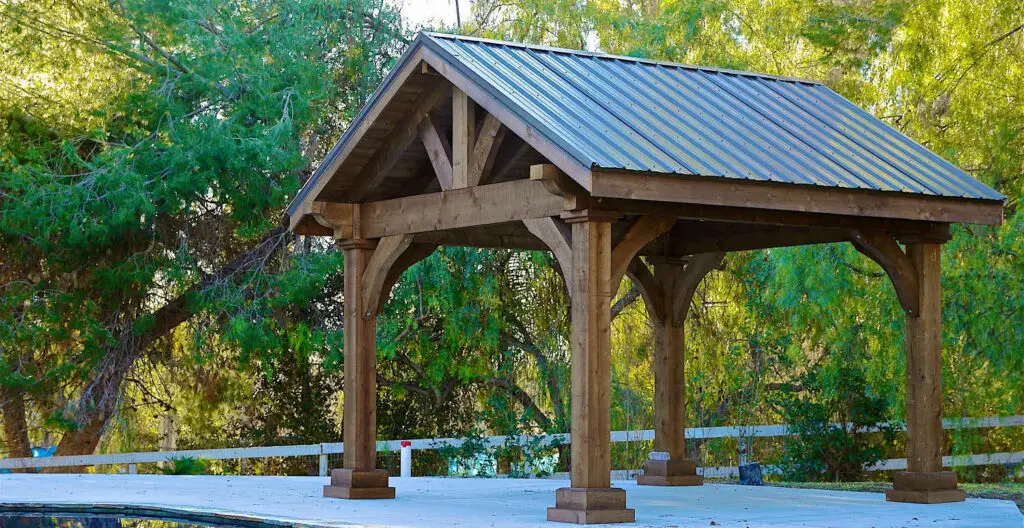
The purpose of constructing a freestanding patio cover is to shield you from the rain and the sun’s glare. As a result, any materials, including tin, can be used for the roof.
Tin roofs, like all metal roofs, have numerous advantages. Roofs made of tin are more durable than those made of wood or plastic. They are also lighter, making installation easier. They’re also fire-resistant.
This patio has a very simple structure, which isn’t necessarily a bad thing. The straightforward design is more functional than aesthetic.
The tin roof is supported by black metal posts and beams that are strong enough. A fan hangs over the table to provide a cool breeze.
4. Freestanding Patio Cover
The classic look will never go out of style. The wooden posts give the patio a classic feel. The shingle roof complements the exposed beam ceiling perfectly. Above the black ottoman, which is the same color as the roof, a fan hangs.
Although this patio is not particularly large, it is still cozy enough to spend your free time on while sipping tea and admiring the beautiful scenery.
5. Fiberglass Freestanding Patio Cover
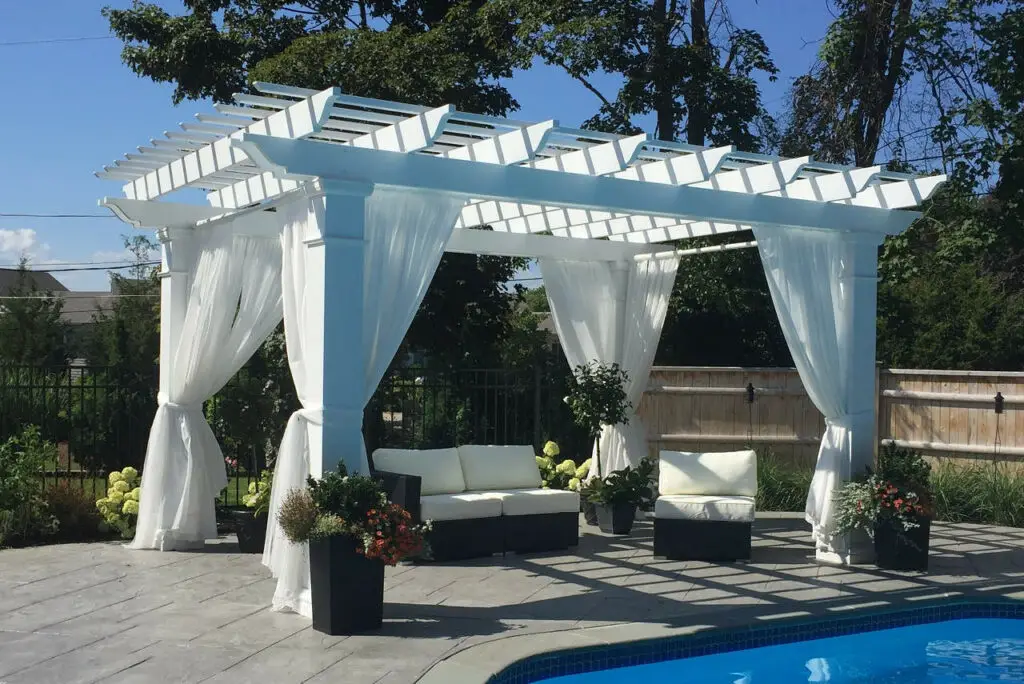
This white patio is supported by four stone posts. The rounded white posts are elegant and go well with the window trims.
The beams have curvy edges that add to the appeal of the patio. The fiberglass roof is also quite nice. It shields you from the rain but does not prevent you from enjoying the sun.
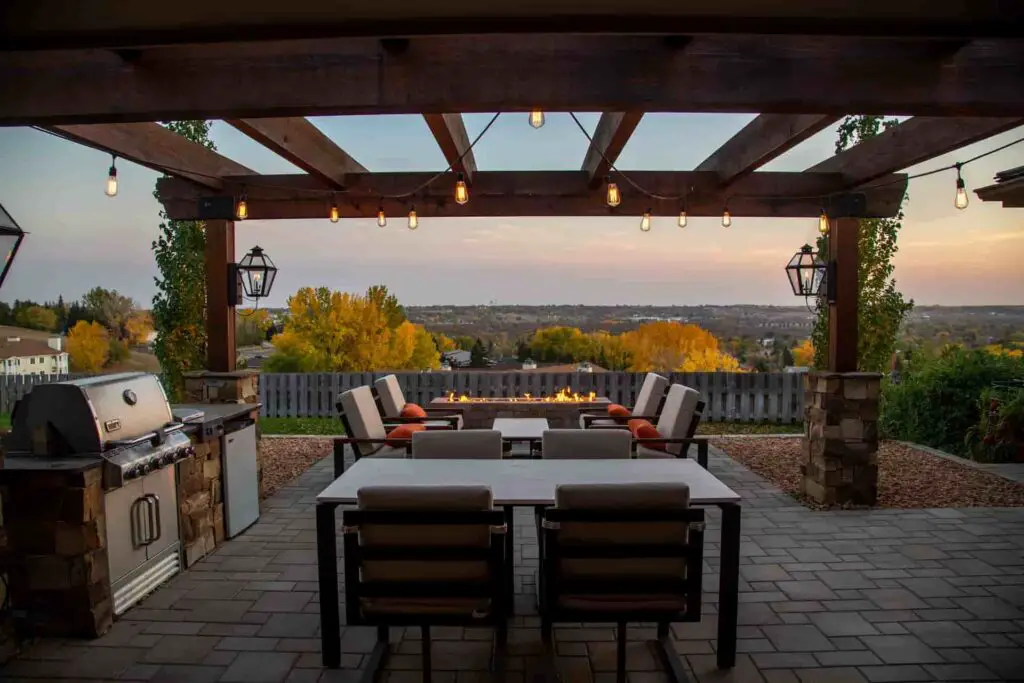
6. Luxurious Patio Cover
Having an outdoor barbeque party can be a fun way to spend your weekend. Even if it is raining outside, this patio cover will ensure your ultimate comfort while having the party.
However, constructing a luxurious freestanding patio such as this one will cost more money and time.
7. Pergola Style Patio Cover
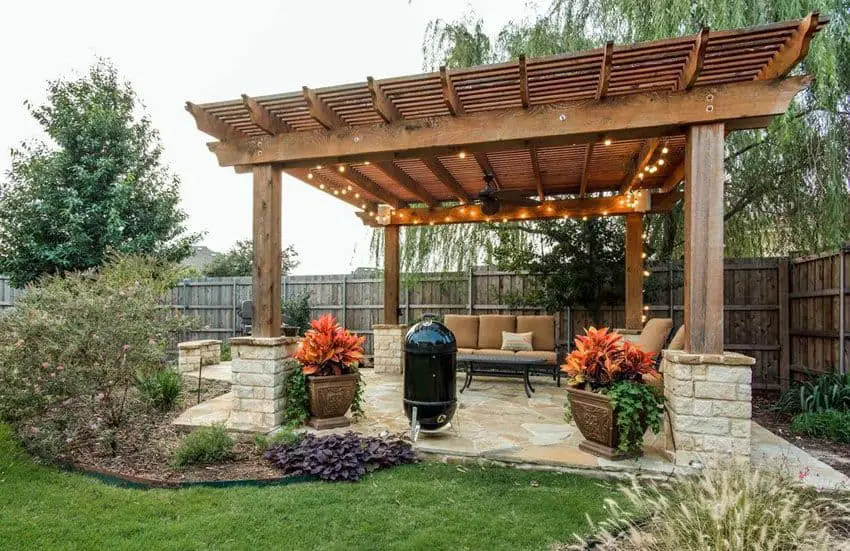
A pergola-style patio cover will be suitable for you if you enjoy sitting in an armchair on your patio and the sun does not bother you.
This type of cover will only shield you from the sun, not completely block it out.
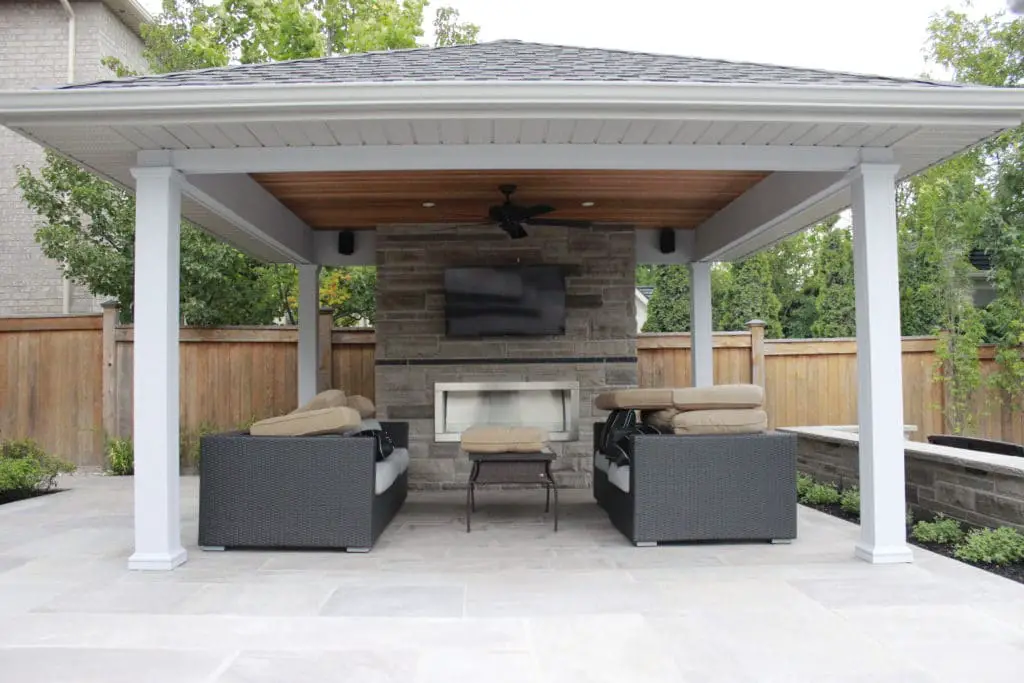
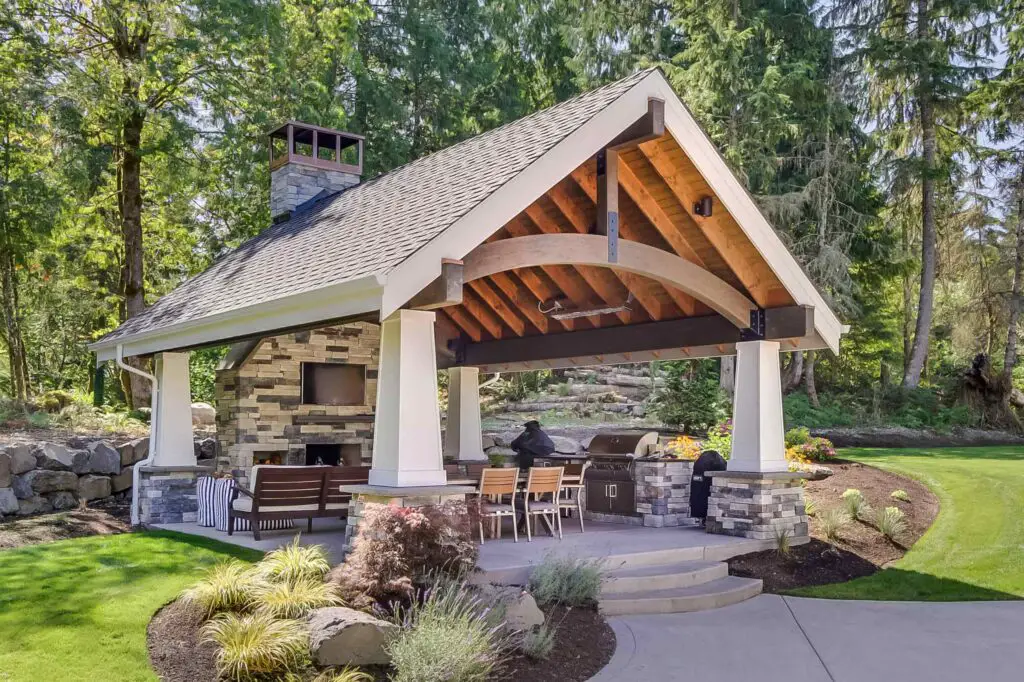
8. Tongue and Groove Freestanding Patio Cover

This patio is a fantastic spot to spend an afternoon. It can also be used as a living room, where you can invite your friends and coworkers over for a cup of tea or coffee.
Each post is adorned with natural stones that complement the fireplace while also drawing attention to the patio.
The tongue-and-groove ceiling gives the room a grand look. Each of the roof’s four sides has a glass window that lets natural light in.
Pros:
- The natural stones that surround each post are the cherry on top.
- The tongue-and-groove ceiling adds to the appeal of the patio.
Con:
- Installing a tongue-and-groove ceiling can be difficult and time-consuming.
9. Plastic Freestanding Patio Cover Idea
Breakfasting outside is a fantastic way to spend your weekend. You don’t need to go on a road trip to realize this.
You can do it right in your backyard on your covered patio. A plastic cover fits perfectly on the beamed ceiling of this freestanding patio.
It aids in the reduction of glare and heat. Even if it’s raining, you can eat your breakfast outside because the cover is water-resistant.
Plastic materials are usually less expensive than wooden materials, which is a plus.
As a result, this freestanding patio cover will provide excellent shade without draining your bank account.
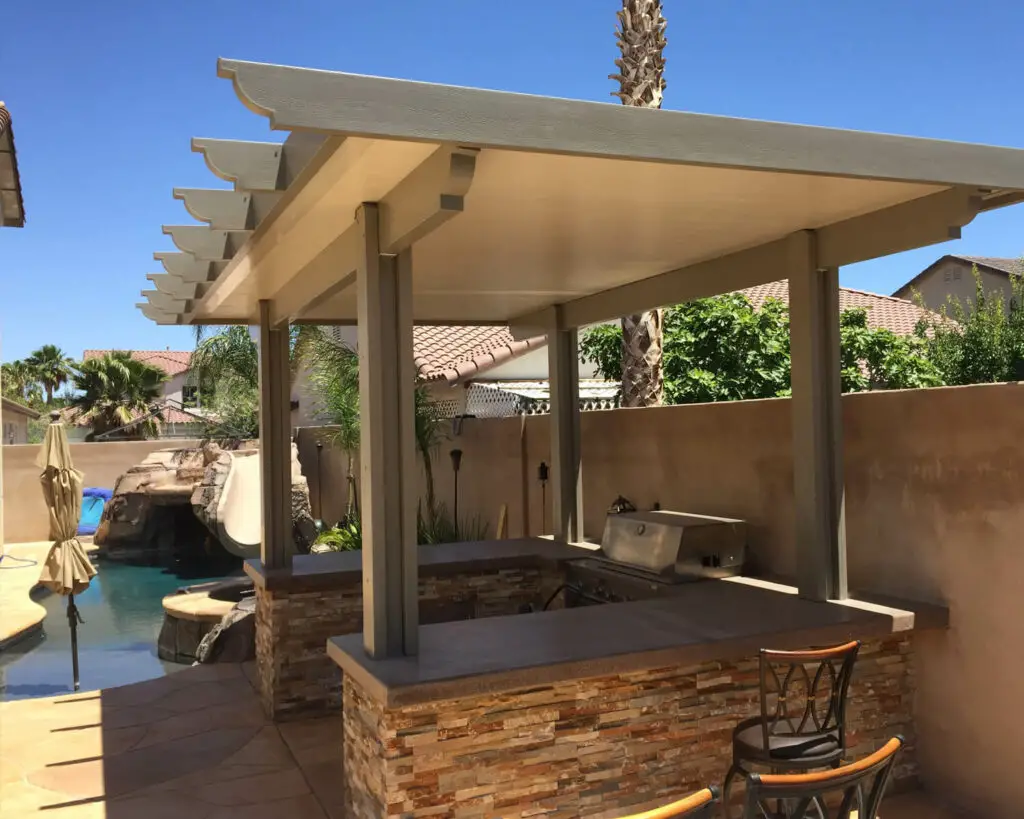
10. Aluminum Patio Cover Idea

Because of its versatility, aluminum has been widely used not only for kitchen utensils but also for patio covers. It has the same appearance as a wooden cover but is less expensive.
With four rounded posts, this white freestanding patio looks fantastic. The curved edges work well with the beams. A fan is hung on the aluminum cover to create a cool breeze on the patio.
This patio just needs some furniture to turn it into a relaxing spot for you and your family to spend some quality time together.
Pros:
- Aluminum is a low-maintenance material.
- It’s also simple to clean and set up.
- Rain and sunlight have little effect on it.
Con:
- Dings are common on aluminum covers.
Conclusion
If you want to create a beautiful and innovative way to expand your home’s living area, building a freestanding patio cover is an excellent alternative.
A freestanding patio cover is a patio cover that is supported by posts and beams and does not require a direct connection to any part of the house or structure.
Building your own freestanding patio cover is easy and requires very few skills. Follow these steps above and you will have your very own build freestanding patio cover.
![What Gravel To Use For Patio Base [Best Options]](https://www.cleverpatio.com/wp-content/uploads/2021/11/What-Gravel-To-Use-For-Patio-Base-270x180.jpg)
Leave a Reply